- What is API testing?
- The significance of API testing in an API-driven era
- What are the different types of API testing?
- What makes Postman ideal for API testing?
- How to test an API in development using Postman (5 Simple Steps)
- What best practices should you follow for API testing with Postman?
- Postman API testing FAQs
- Closing thoughts

GSD
How to Use Postman to Test an API During Development in 5 Simple Steps
Posted by Soham Kamani on August 1, 2024
Whether you're a Software Developer, DevOps Engineer, or Quality Assurance (QA) professional, understanding how to use Postman for API testing is crucial, especially during the development phase. Proper API testing using tools like Postman ensures security, enhances user experience, and prevents potential revenue loss due to bugs or vulnerabilities.
Postman is an API development environment that allows you to design, test, document, and manage your APIs through its user-friendly interface and automation features. According to a survey of over 40,000 developers, including CEOs who use Postman, over 43% reported that their APIs generate more than a quarter of their company’s revenue.
Take the first step in learning how to use Postman to test your APIs. Let’s get started!
Table of contents
What is API testing?
API testing is software testing that evaluates the functionality, reliability, performance, and security of Application Programming Interfaces (APIs). The primary goal of API testing is to ensure that APIs work as intended, providing reliable and secure communication between different software systems.
To better understand API testing, you need to know what APIs are.
In modern software architectures, applications often need to communicate with each other to deliver solutions. This is where APIs come in. APIs facilitate the process of communication between different software applications. They act as bridges or intermediaries, enabling interaction and data exchange.
But what does API testing entail?
API testing involves sending requests to an API and verifying the API responses against expected outcomes. This process aims to ensure that the API behaves as intended under various conditions. These conditions include:
-
Handling different types of requests
-
Returning accurate data
-
Maintaining stability and performance under load
The significance of API testing in an API-driven era
Let’s say you’re developing a mobile app for booking appointments with healthcare professionals. Your app relies heavily on APIs for backend communication, user profile management, appointment scheduling, and integration with third-party services like payment gateways.
Ensuring your APIs are reliable, secure, and high-performing should be a top priority during development.
But here’s the catch: your application is ready and in use, but you skipped the crucial step of API testing.
As a result, your app now faces issues like incorrect appointment times, unavailable slots, security vulnerabilities, and poor performance. These problems frustrate users, compromise sensitive data, violate privacy laws, and disrupt service during peak times.
Phew… a lot can go wrong without proper API testing.
By conducting thorough API testing, you can:
- Ensure functional accuracy: Verify endpoints behave as expected, like correct appointment scheduling.
- Secure data: Validate authentication mechanisms and protect against vulnerabilities like SQL injection and Cross-Site Scripting (XSS).
-
Optimize performance: Conduct load testing to handle concurrent requests efficiently and maintain fast response times.
This is why it’s important to learn how to test API endpoints in Postman. Remember, API testing is an ongoing process throughout the development lifecycle. It helps catch regressions during updates or new feature implementations, ensuring stability and reliability.
What are the different types of API testing?
API testing is a broad field with various approaches tailored to specific needs and contexts. Let’s look at the most prevalent types of API testing.
-
Functional testing: This testing involves validating whether the API operates as designed and fulfills its intended purpose. It is done by sending various requests to the API’s endpoints and comparing the received responses against predefined expectations.
-
Performance testing: This assesses an API’s ability to handle high volumes of requests and maintain optimal performance under stress. It involves measuring key performance indicators (KPIs) such as response time, throughput (requests processed per unit of time), and resource utilization (CPU) under varying load conditions.
-
Security testing: This testing protects the application against potential security risks such as unauthorized access, data leakage, and cyberattacks. It involves thoroughly examining the API’s security infrastructure, including authentication methods, encryption algorithms, and susceptibility to known vulnerabilities, to ensure the API is protected against these threats.
-
Integration testing: This type of testing ensures that different parts of an application, including APIs, work together smoothly. Specifically, it checks how well the API integrates with other systems, databases, third-party services, or even other APIs, ensuring seamless interaction among them.
There are several other types of API testing processes, including unit testing, validation testing, regression testing, reliability testing, runtime error detection, etc.
Note that for the sake of this tutorial, we will primarily focus on functional testing using Postman.
What makes Postman ideal for API testing?
As a developer or QA professional, you need a tool that simplifies testing your APIs.
Luckily, Postman can do all these. Its user-friendly interface and extensive feature set make it an invaluable tool for developers involved in API testing. It allows for early issue detection.
But aside from this, what really makes Postman an ideal solution? Let’s find out.
Environment Management
Environment Management in Postman refers to the ability to configure and save different settings for your API tests, such as base URLs, headers, and authentication tokens, under separate profiles known as environments. This feature is particularly useful when you need to test different versions of an API or when working across multiple environments (e.g., development, staging, production).
Comprehensive support for HTTP methods
Postman’s comprehensive support for HTTP methods means that you can execute any operation typically performed via an API, such as retrieving data (GET), submitting new data (POST), updating existing data (PUT), or deleting data (DELETE) directly within the Postman interface.
Efficient request and response validation
Postman provides efficient validation capabilities for requests and responses through its dynamic expressions and assertions feature. For instance, when testing an API endpoint that returns a JSON object containing user details, you might want to ensure that the response includes specific fields like name, email, and age. Using Postman’s assertion feature, you could write a condition to verify that these fields exist in the response body.
Collaboration features
Postman’s shared collections and environment management features allow team members to work together, which fosters collaboration among development teams. So, teams are able to work together and maintain consistency across projects. This collaborative approach improves productivity and quality control in API testing.
How to test an API in development using Postman (5 Simple Steps)
Let's try out Postman with ButterCMS, a headless CMS platform that stands out for its comprehensive REST API. This tutorial will guide you through testing ButterCMS's REST API endpoints with Postman. You will learn how to test API using Postman.
As you work through testing with Postman, consider taking advantage of ButterCMS with a free 14-day trial to see how easily you can manage and integrate your content through its robust API.
Step 1: Install Postman
Start by downloading and installing Postman from the official website and selecting the Windows, macOS, or Linux version. You can also use the web app, Desktop agent, or VS Code extension. For this tutorial, we’ll use the macOS app. Choose the appropriate processor type for your system.
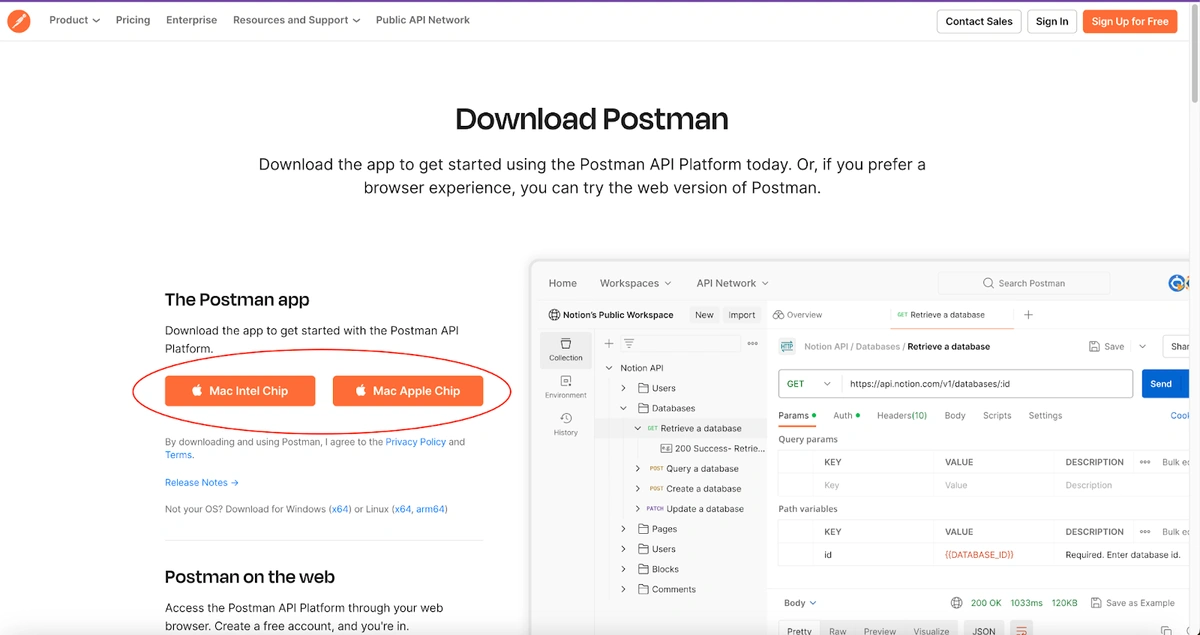
Downloading Postman
After downloading the application, launch Postman and sign in or create an account to get started:
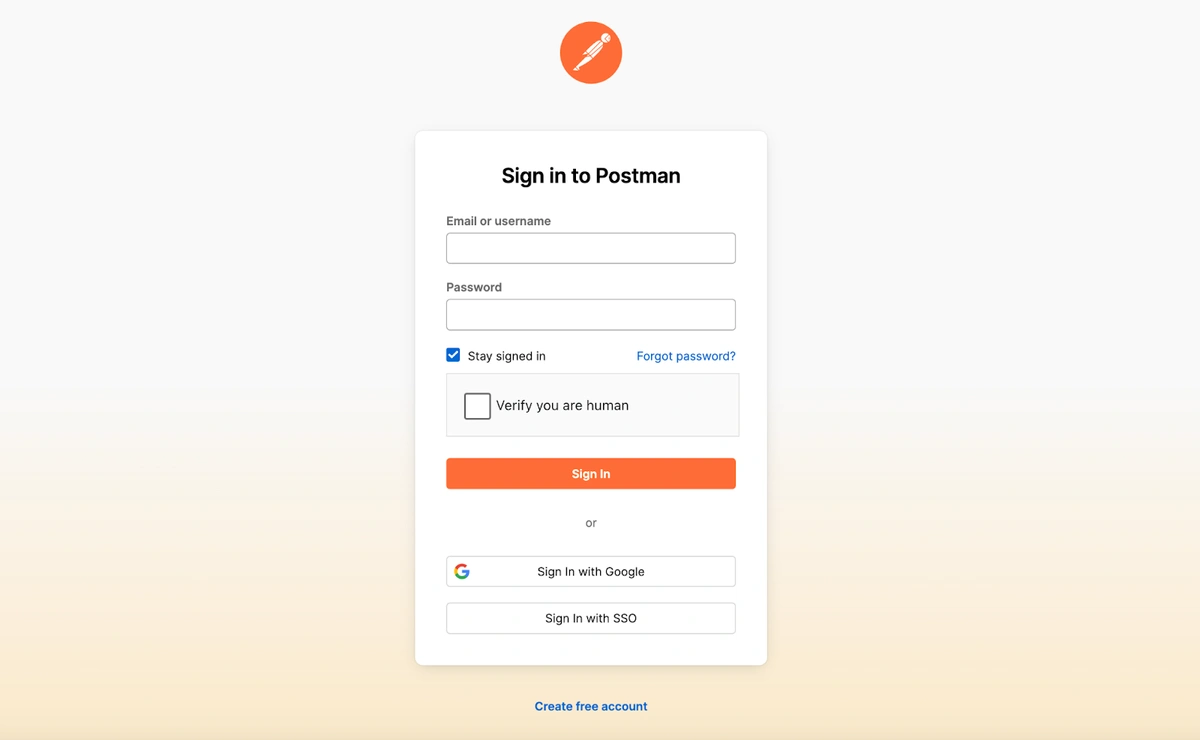
Creating an account on Postman
Step 2: Create your first request
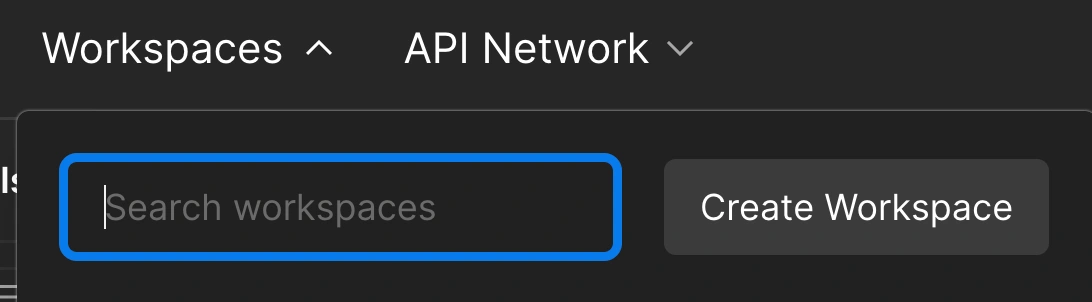
After opening Postman, navigate to the 'Workspaces' tab and click 'Create Workspace' to manage all your requests and endpoints.
Click the '+' icon to add a request:

This action will open a new tab where you'll find input fields and tabs to configure your request:

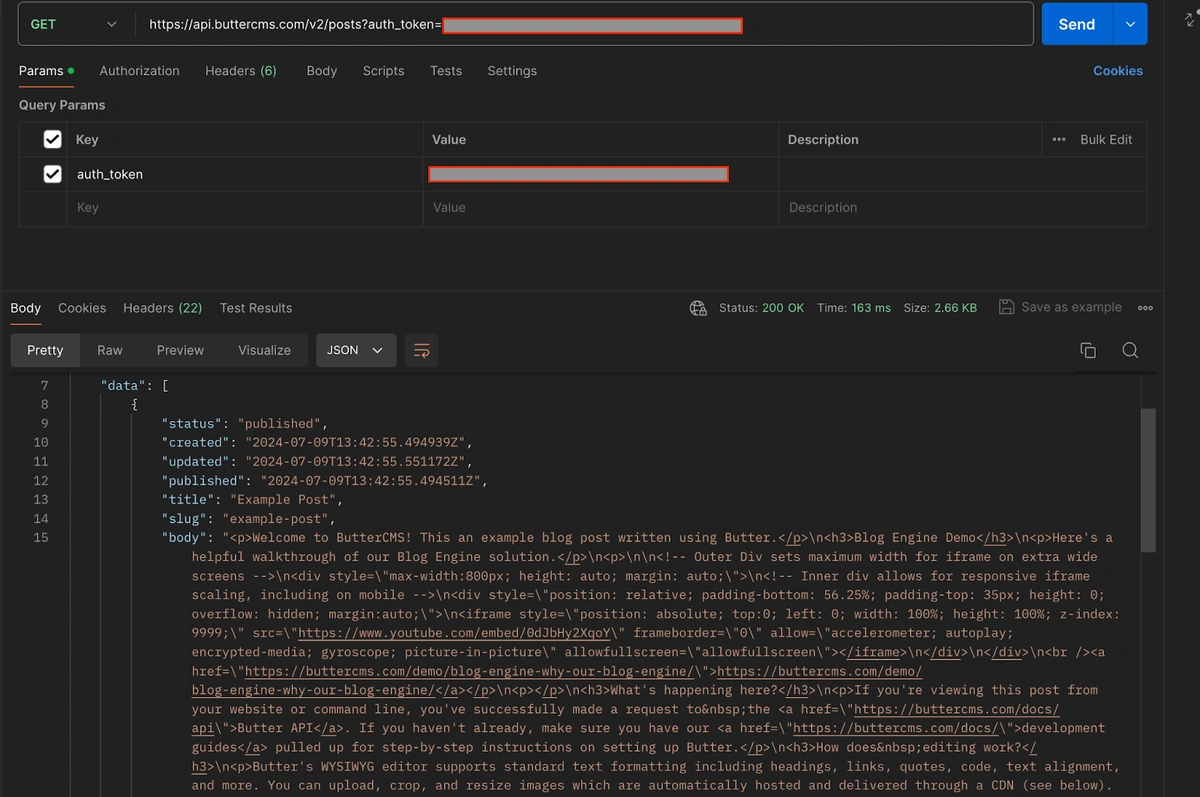
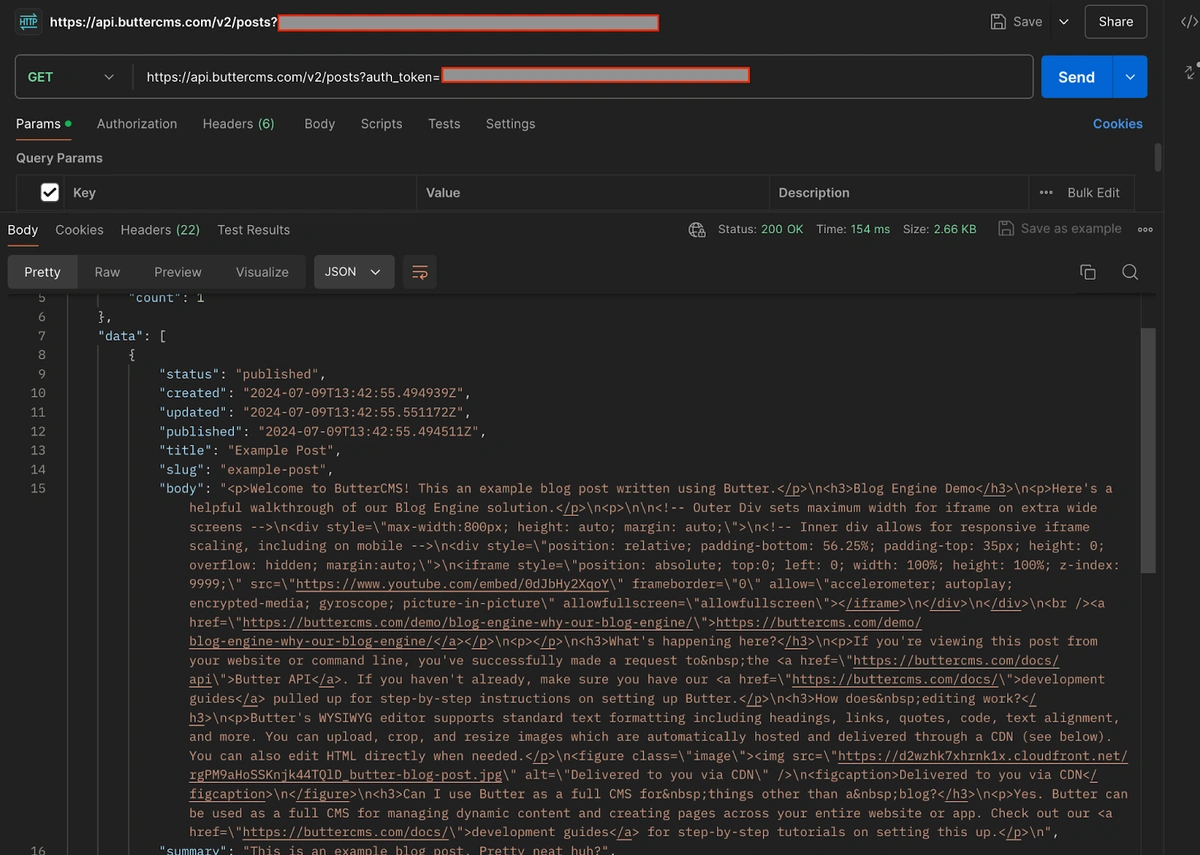
Enter the ButterCMS API endpoint URL to test. For example, to retrieve posts, use https://api.buttercms.com/v2/posts with the GET HTTP method.

To authenticate your request with ButterCMS, include your ButterCMS API key as a query parameter. Go to the 'Params' tab, add a new parameter with Key 'auth_token', and set its Value to your API token. Refer to the documentation for instructions on obtaining your API access token.

Click the 'Send' button at the top-left of the request panel. Postman will execute the request and display the response, including the status code, response time, and body, in the lower section of the window:
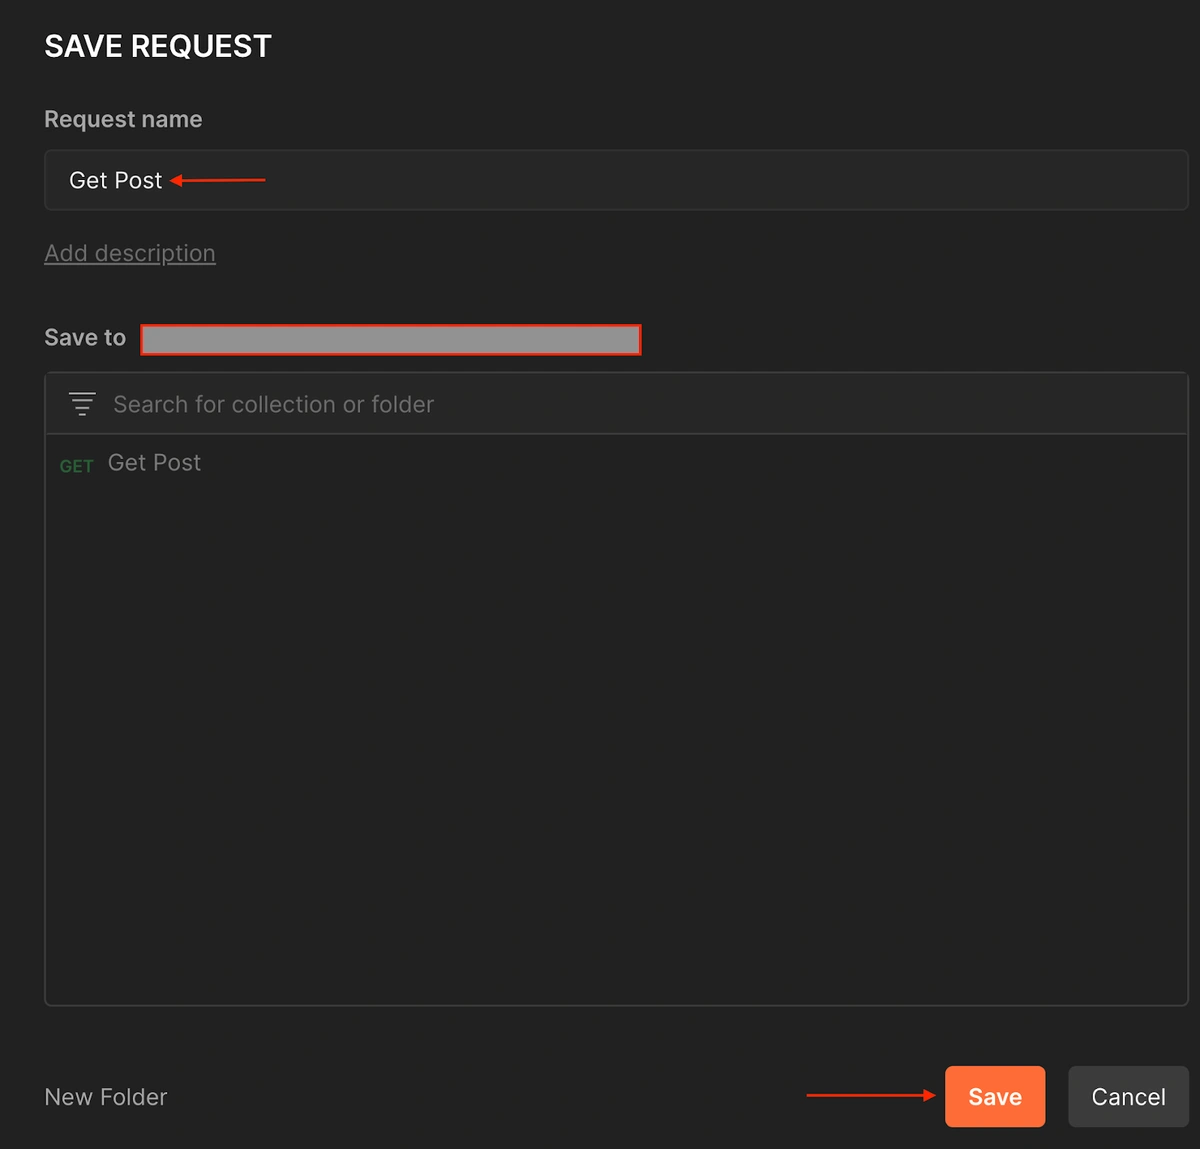
Click 'Save' at the top right to save your request and response:

Then, it opens a window for you to name your request 'Get Post' and click 'Save':
Step 3: Importing requests
Creating our first request was simple, but let's simplify it further. Manually entering data for multiple APIs is time-consuming. Postman allows us to import curl commands directly from ButterCMS API documentation. Just copy the curl command and import it into Postman for quick setup and consistent testing.
Find the 'Import' button in the top-left corner of your Postman window:

Click 'Import' to reveal options:
-
Link: Paste a direct link to a Postman collection or request online.
-
File: Upload
.json,.postman_collection.v2.1,.postman_environment.json, or.pmmlfiles containing requests.
-
Raw Text: Paste raw JSON or PMML code directly.
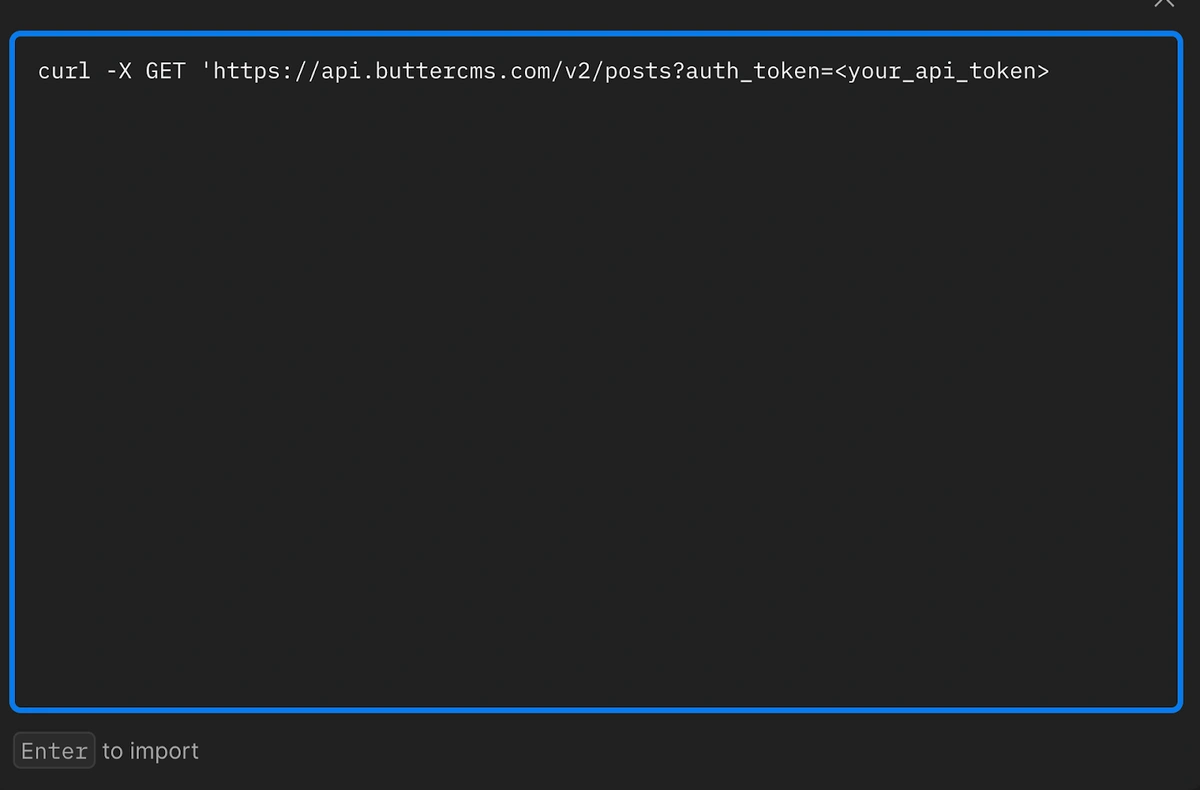
Choose 'Raw Text' and paste your cURL command:
curl -X GET 'https://api.buttercms.com/v2/posts?auth_token=<your_api_token>
Replace <your_api_token> with your API token and click “Enter”:
Postman automatically recognizes cURL syntax and converts it into a Postman request. Clicking 'Send' will still work as expected:
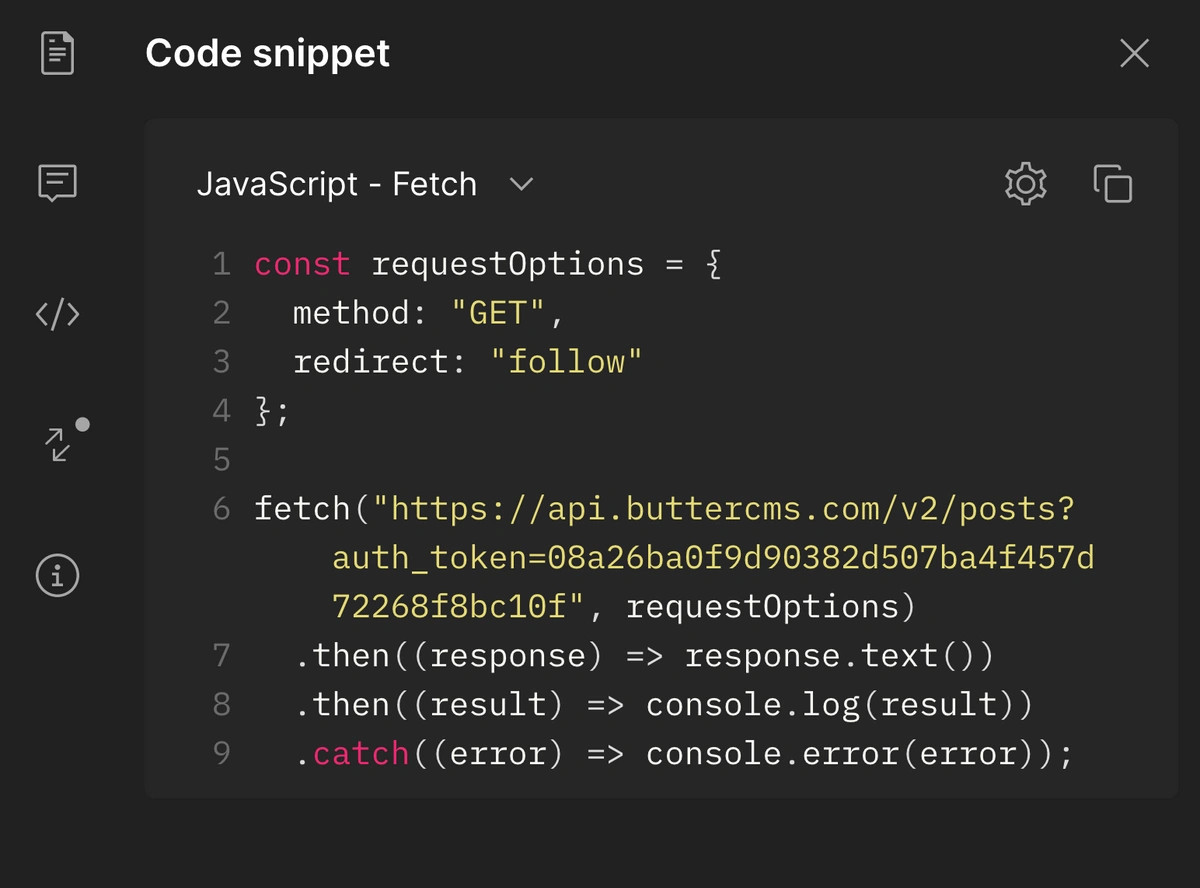
Step 4: Exporting requests as code
When testing APIs in Postman, integrating them into your application is natural. ButterCMS supports client implementations in Ruby, Python, JavaScript, PHP, Go, and C#. Exporting requests from Postman is essential for custom HTTP clients or direct coding.
To export your request, navigate to the left side and click the “</>” icon representing the code:

Afterward, a dialog box will open where you can specify how to export your request in various formats, along with a copy icon to directly copy the code to your clipboard:
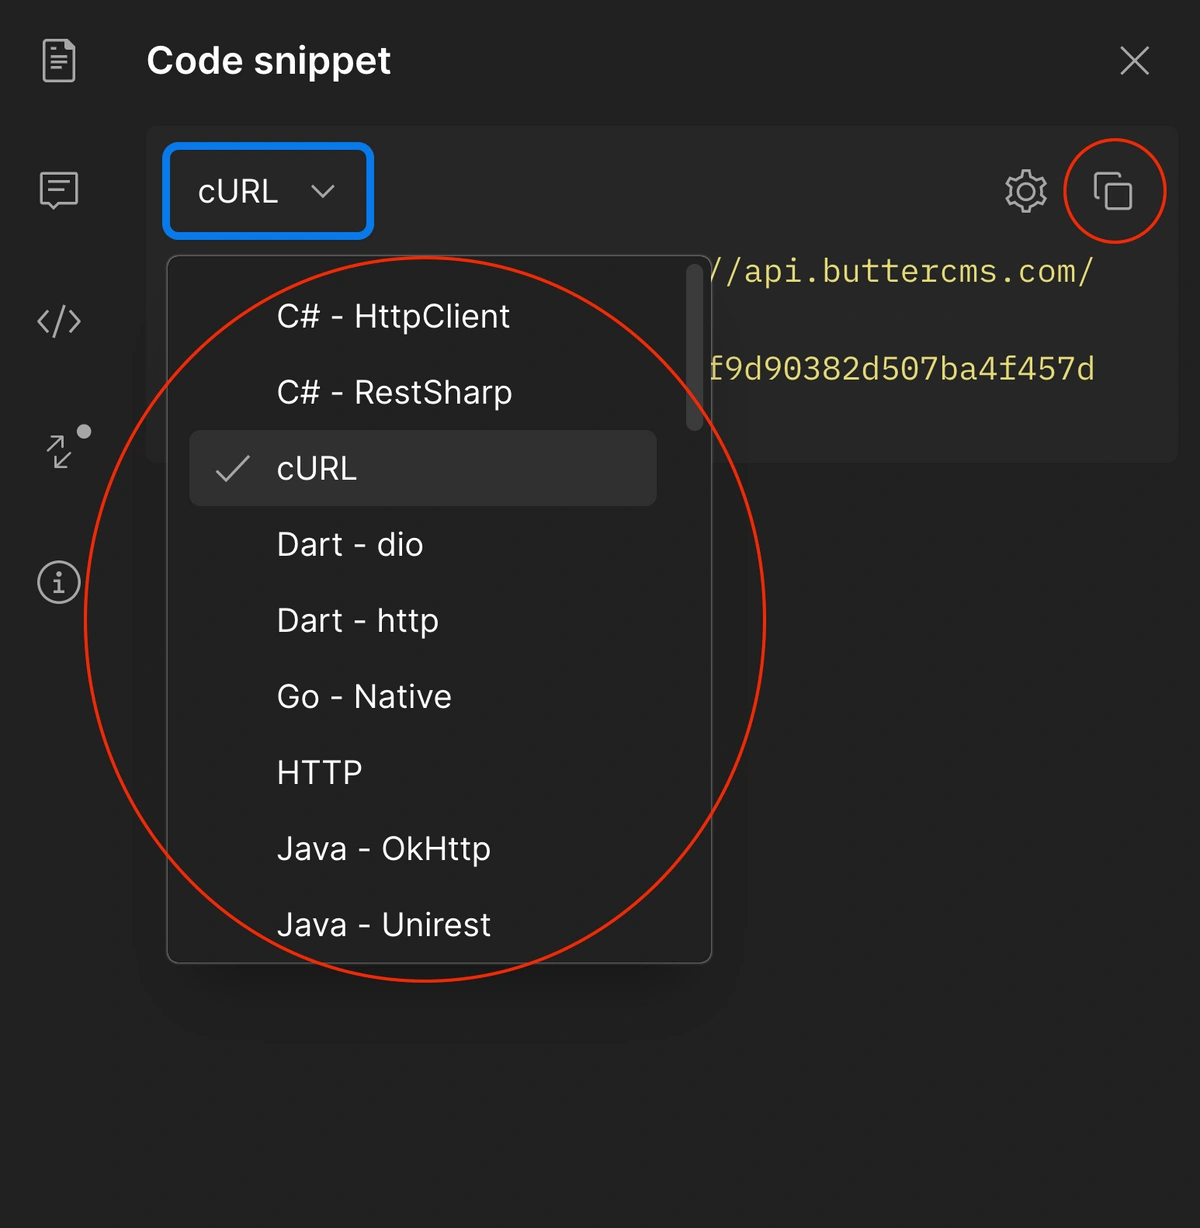
For example, here's the "JavaScript" implementation, which actually has the complete program to execute your HTTP requests:
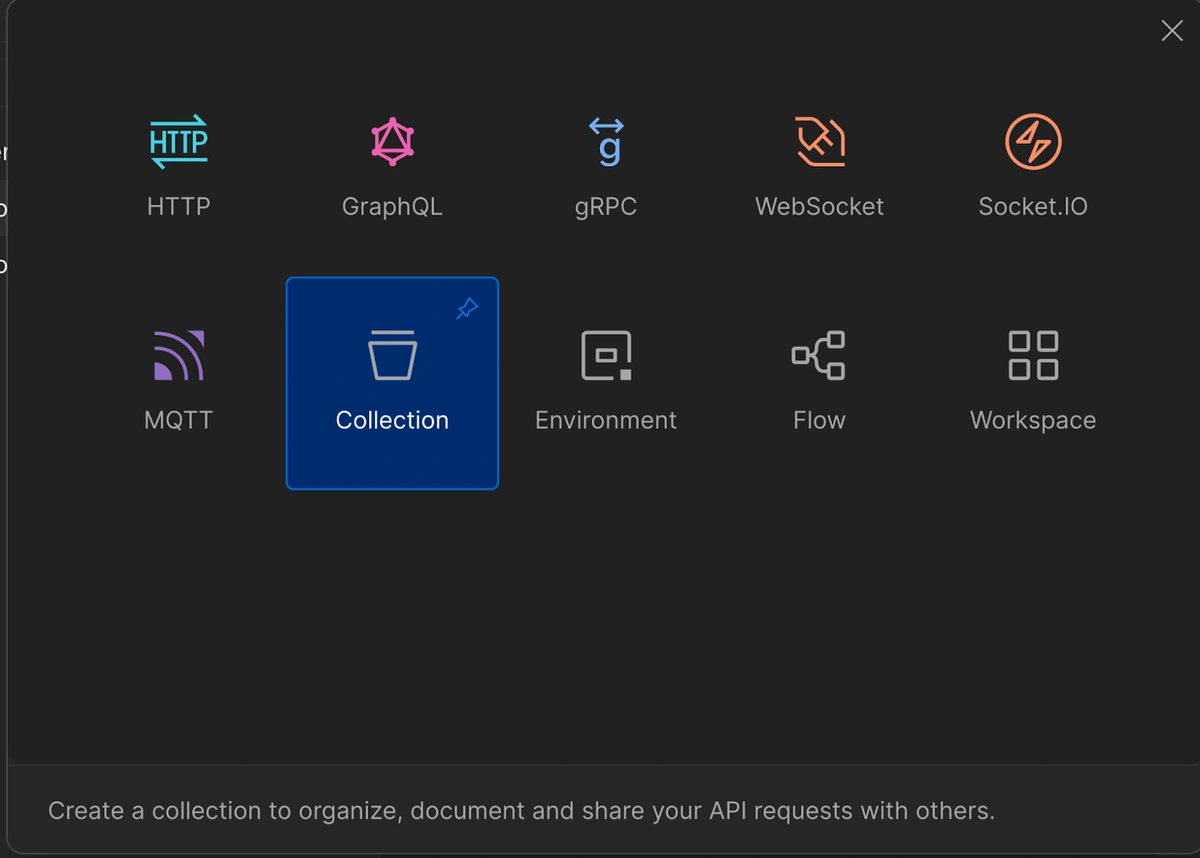
Step 5: Creating a new collection
To simplify your API testing process, especially when working with a broad API like ButterCMS that includes many endpoints, using Postman collections is very helpful. Collections enable you to bundle related API requests, cutting down on redundant tasks and making it simpler to share and collaborate.
To create a new collection, navigate to the top left corner in Postman and click the “New” button:

Then, select the 'Collection' option:
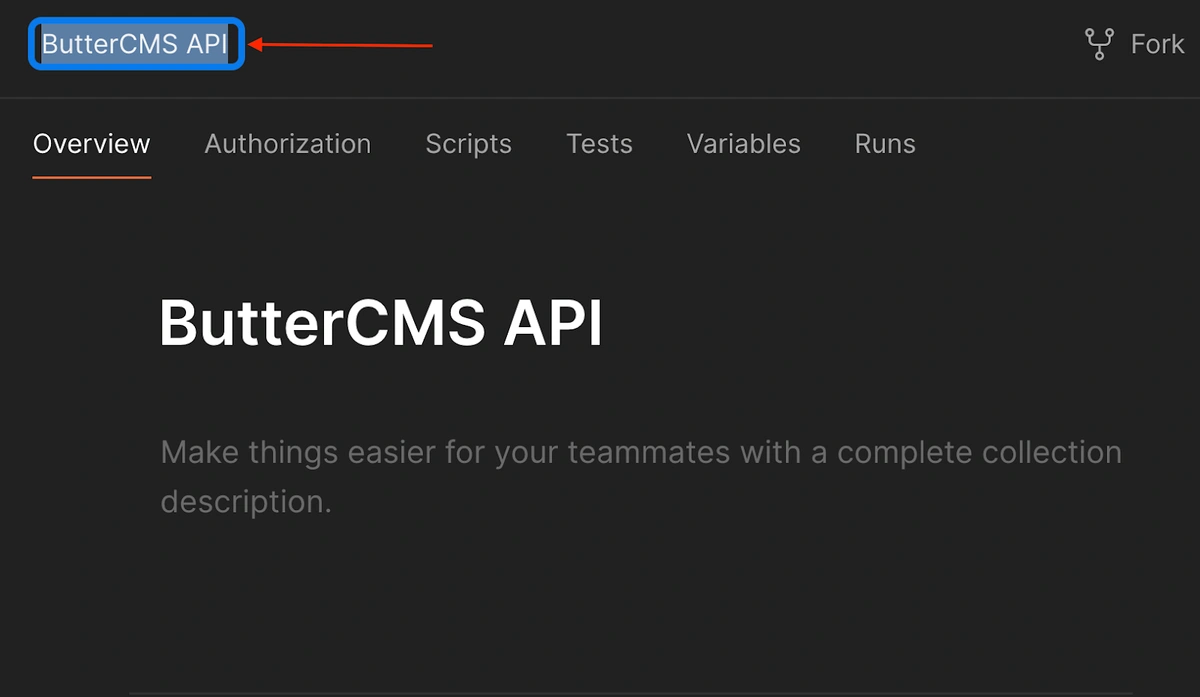
Once you click on it, your new collection will be created. Give your collection the name 'ButterCMS API':
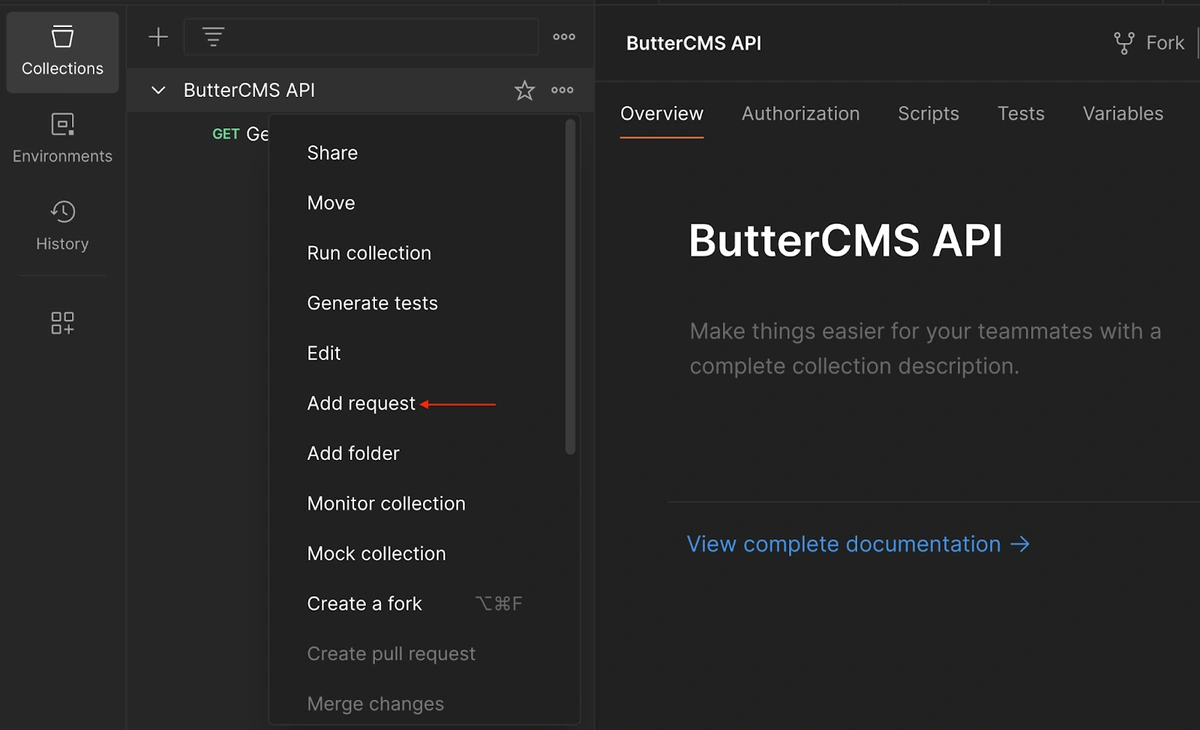
To add an API request to the collection, you can either drag and drop an already existing request or right-click on the request and select the 'Add request' option:
Adding variables
Now that all the APIs have been added to the collection, we can extract a few data points that could change often. One glaring data point is the auth token. Although the auth token is fixed for us, it changes for every user or account. If we want to share this collection with our colleagues, we must replace the auth token on every endpoint. Postman simplifies this with collection variables, making it easier to manage changing data.
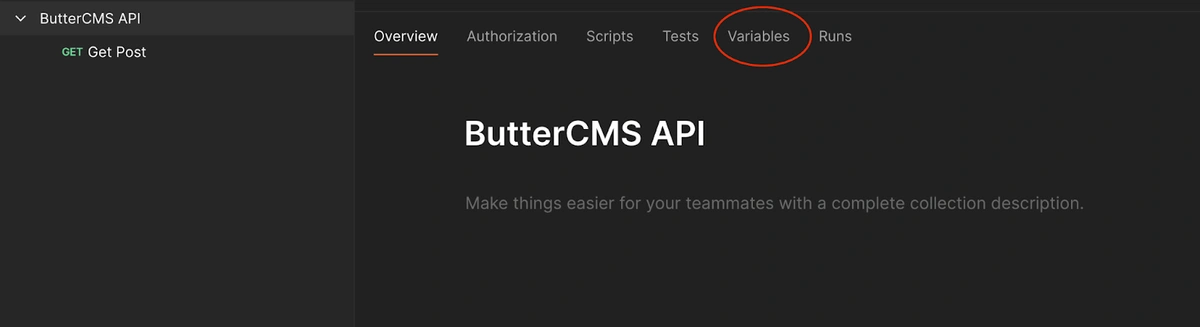
To use the auth token as a variable in your 'ButterCMS API' collection, go to 'Variables':
After clicking on it, add a new variable named 'authToken' in the input fields. Leave the 'Initial value' field blank, as 'authToken' varies per user or session. Then, input your API token in the 'Current Value' field, which automatically updates when you assign a new value through the collection or environment editor or by dynamic assignment in a request:

To use the variable in your API requests, reference it within your request and change the auth_token query param to {{auth_token}}.
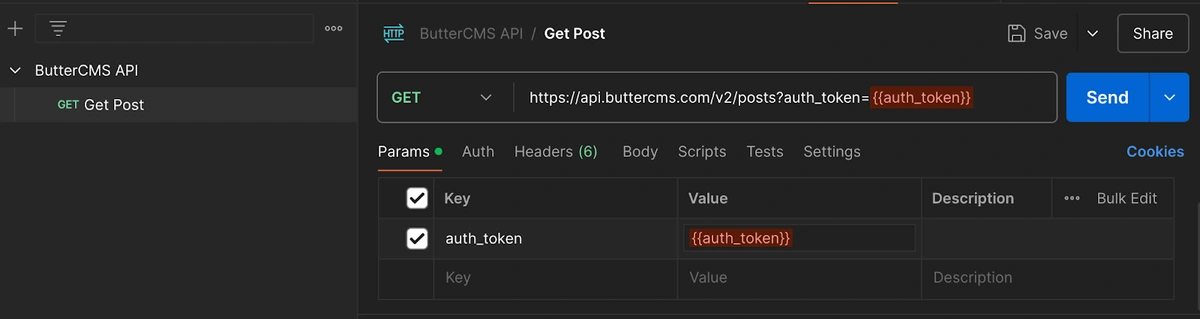
Now, your request should run like it did before. If you add more APIs to this collection, you can use the "{{auth_token}}" variable instead of entering your auth token each time. If your auth token changes, you should change the variable's value in the edit menu.
Exporting your collection
Once you add requests to your collection, you'll need a way to share it with fellow developers. You can export any collection on Postman as a JSON file by using the 'Export' option:
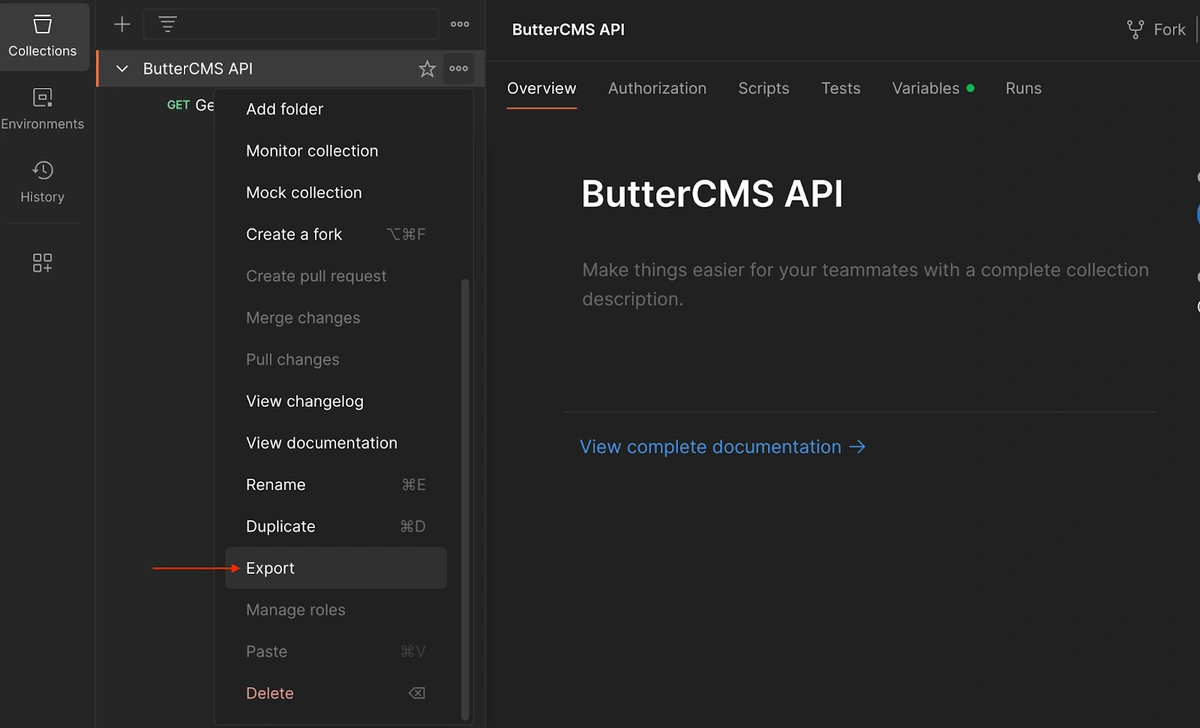
Once open, click 'Export':
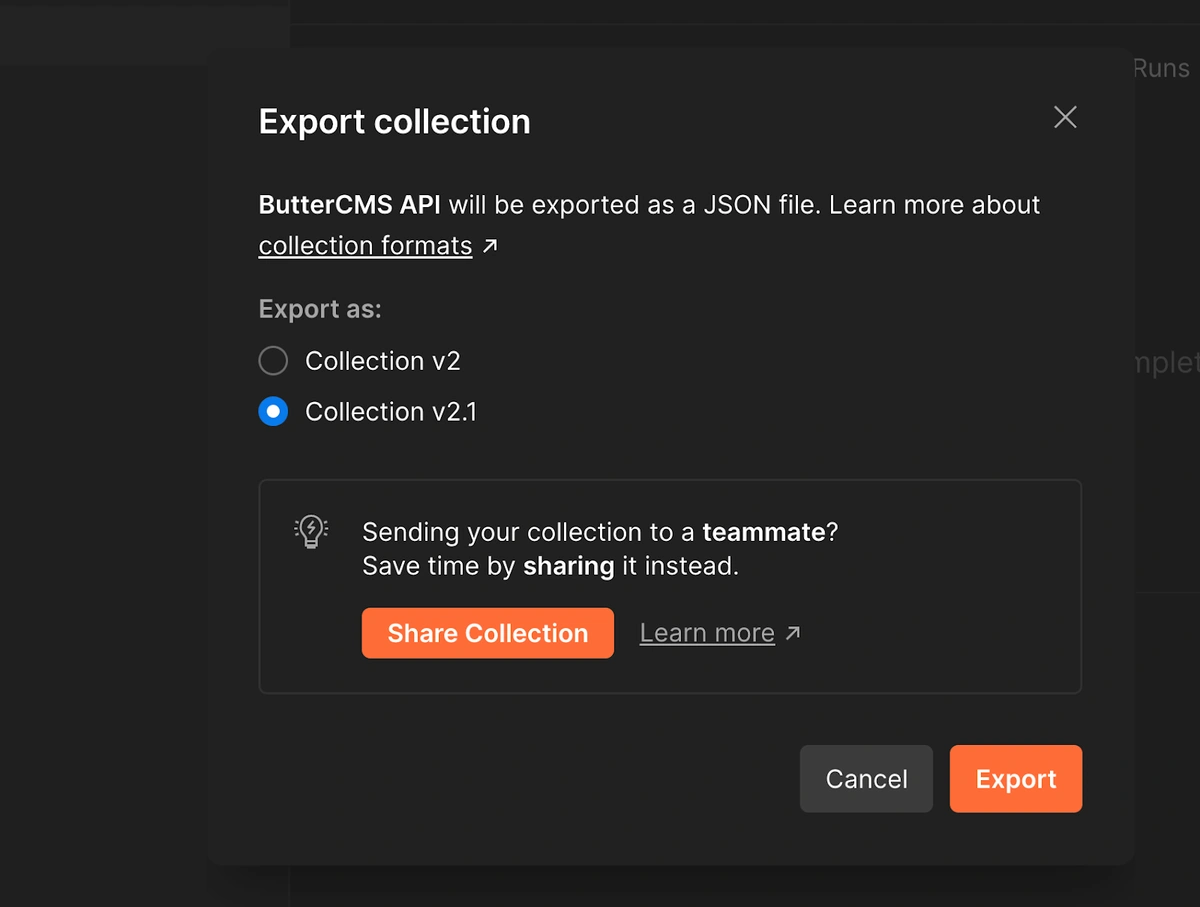
This file can be imported into any Postman application with all variables and settings.
Now that you've mastered the basics of setting up and testing your REST APIs with Postman, take this opportunity to experiment on your own. Try creating a new collection, adding variables, and exporting your requests as code.
What best practices should you follow for API testing with Postman?
You now know how to test REST APIs with Postman, so let's look at best practices for API testing:
Organize your tests with collections
When you have multiple requests, group the related API requests into collections. This helps keep things organized and makes it easier to manage and execute tests, especially when dealing with complex REST APIs like those offered by ButterCMS. Failing to do so can lead to disarray, making it difficult to locate specific tests, track dependencies, and guarantee comprehensive coverage.
Utilize environment variables wisely
Use environment variables to store your dynamic data, such as API keys, base URLs, and other credentials. They will ensure your tests are secure, more flexible, and reusable across different environments (development, staging, production). For instance, if your API key changes due to updates or rotations, you simply update the environment variable value, and all your tests automatically use the updated key without requiring manual changes in each request.
Document your API tests
If you want to share your API tests with your team members or save them for future reference, you can use Postman to create documentation for your API tests. While you do that, ensure that the documentation is clear and concise so that it remains understandable and maintainable.
Automate your API tests where possible
You can automate your repetitive API tests to reduce manual errors and save time. Postman supports automated testing through its built-in collection runner and integrations with CI/CD pipelines. Automation ensures that your API behaves as expected throughout the development lifecycle, catching regressions early and improving overall quality.
Postman API testing FAQs
How to check if an API is working
To check if your API is working in Postman, create a new request, enter the API endpoint URL, select the appropriate HTTP method, and click 'Send.' Review the response status code, time, and body to assess your API’s functionality.
How to use Postman to test API with authorization
For API testing with authorization in Postman, select the request, open the "Authorization" tab, choose the authorization type (e.g., Bearer Token), and enter the required credentials. Then, send the request to validate authorization.
What are the limitations of Postman?
Postman's limitations include limited support for mock servers, no native database testing, a complex UI for beginners, and dependency on external services for certain features.
What does the future hold for API Testing?
Future advancements in Postman for API testing may include enhanced collaboration tools, improved integration with development tools, expanded security testing capabilities, and the introduction of AI-powered insights for predictive analytics. For instance, real-time collaboration features could enable multiple testers to work on the same collection simultaneously, sharing notes and updates seamlessly.
Receive tutorials, informative articles, and ButterCMS updates to keep your work running smoothly.
Closing thoughts
Working with the ButterCMS API in Postman demonstrates the importance of keeping your tests tidy and your workflow smooth. Using collections, variables, and automation can be very helpful. Plus, always document your tests so everyone understands what's happening. Whenever possible, automate API testing for repetitive parts. This approach makes your apps more dependable and simplifies collaboration within your team.
So, why not visit the ButterCMS API documentation or to learn more and even sign up? There's a lot to discover there!
Post updated August 2024 by Deborah Emeni.
Make sure you receive the freshest tutorials and Butter product updates.
ButterCMS is the #1 rated Headless CMS


Related articles
Don’t miss a single post
Get our latest articles, stay updated!
Soham is a full stack developer with experience in developing web applications at scale in a variety of technologies and frameworks.